In the first part of this series, we have seen how we can setup a self hosted agent (in this case on a Raspberry Pi). To recap, here’s a quick list of things required to do on the target host (this is agnostic to the underlying operating system):
- Get the latest agent version available (head to the Azure DevOps website > Project settings > Agent Pools > your pool > new agent > download agent)
- Extract the file
- Run the config file and specify:
- Server URL
- Your PAT
- Agent pool
- Agent name
- Work folder
- Run the run file or configure as a service.
This is fine and easy enough, if you are targeting just one host.
Deploying agents to my Raspberry Pi cluster 🔗
I have a cluster consisting of 4x RaspberryPi4 2GB. Repeating the previous task 3 more times, would not only consume some time, but would also be error-prone.
While I was studying this topic, I found that you can also deploy agents to containers (we will cover that in a 3rd part). You can deploy it to containers by essentially running a script that Microsoft made that will do all of the previous steps for you, and run the config with an “unattended” switch.
That seems to be a promising way to overcome the burden of having to configure all of those steps again and again. However, there were some changes that I’ve had to make to that script so that it worked in our case, as we will see next. Even so, we still have to figure a way to run this script on each host.
Ansible to the rescue 🔗
My latest post was about “A (very) small introduction to Ansible” and it was specifically written with this scenario in mind. If you are not familiar with Ansible, I strongly suggest that you give that post a read, so that the next part doesn’t seem (so) magic.
In short: we will use Ansible playbooks to automate the whole previous process.
The playbook 🔗
You can find the playbook here, along with the rest of the files needed to successfully deploy an agent.
This playbook will:
- Install jq, if it’s not already present (required to query which agent to download)
- Create the folder that will hold the scripts
- Create the folder that will have the required components to run the agent
- Create the folder that will hold the token
- Copy the scripts:
- constants - Holds information that our agent needs. (You will need to change this file to match your reality)
- downloadAndInstallAgent - Downloads and installs the agent
- setup_dotnet - Downloads and installs dotnet 3.1
- Download and install the agent, by running the
downloadAndInstallAgent.shscript - Download and install dotnet 3.1 by running the
setup_dotnet.shscript - Add dotnet to the
PATHandDOTNET_ROOT - Force the agent to reload the environment variables
- Install the agent as a service
- Start the service
To execute the playbook we just need to run the following command: ansible-playbook playbook.yml -K. We will see this -K later on.
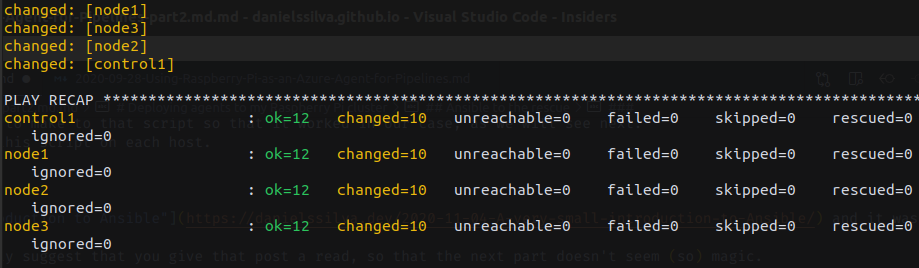
Here is a screenshot of the playbook result:
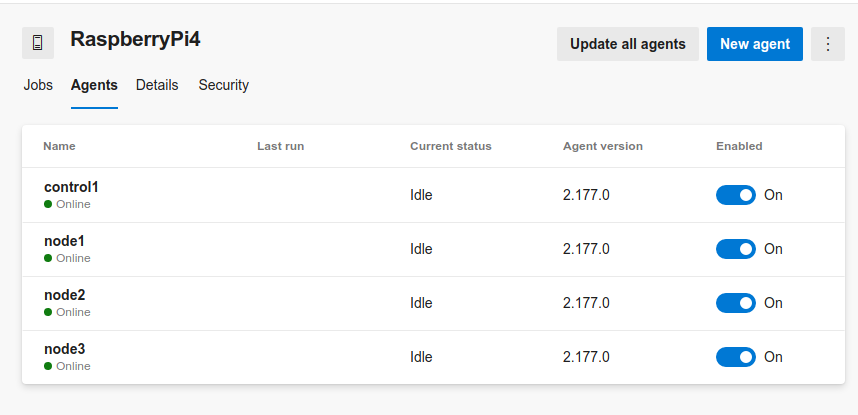
If we head to our pool on Azure DevOps, we can see that all nodes are up and running.
Running multiple pipelines at the same time 🔗
If you are reading this article, chances are that you want to either have your own agent to speed up testing, or you probably want to speed up the pipelines process by running multiple pipelines at the same time.
Keep in mind that running parallel jobs might have some additional costs. Take a look at this image (this can be found on project settings > Pipelines > Parallel jobs):

In this case, because I’ve created this project as public, I have unlimited parallel jobs!
Let’s run some pipelines and see if they are actually running in parallel (you can clone/fork this repository, which is the same that I’ve used on part 1). It has the 4 pipelines that are running here:
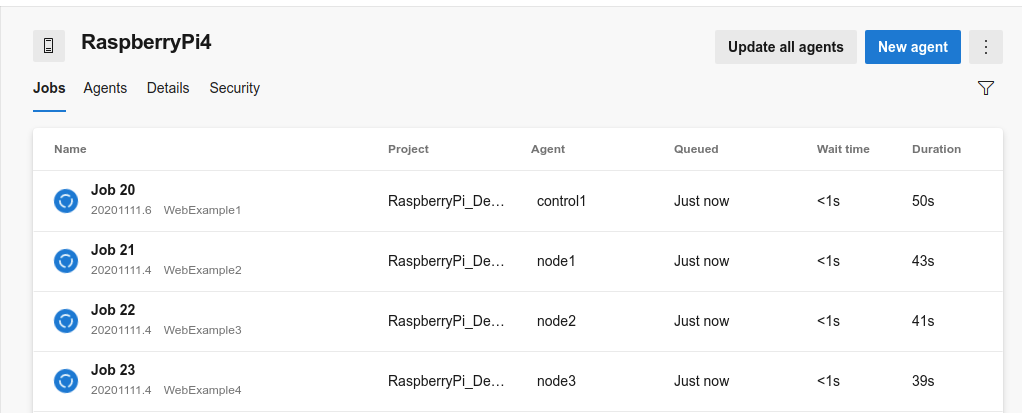
As you can see, all the pipelines waited for less than 1 second before being assigned to an agent and started running.
Playbooks - Behind the scenes - some caveats 🔗
Using this playbook really speeds up the deployment/configuration process. But during the creation of this, I’ve “hit the wall” many times, sometimes because I’m new to Ansible, others because it has some odd behaviour.
Let me highlight some of the points that I consider to be key: On the playbook:
- the
-Kswitch: As mentioned before, this is required so that Ansible knows what’s thesudopassword so that it can use it on modules that run withbecome:true become: When a module requires higher privileges (sudo), we can specifybecome: true. By doing this, we are telling Ansible to run that module as sudo.- vars: Variables are really useful. In this case, built-in variables such as
{{ansible_env.HOME}}and{{ansible_env.PATH}}allowed me to specify the home directory and the path, without having to hardcode them into the playbook. Notice that the HOME variable is related to theremote_user(daniel in this case) - copying scripts: This one was interesting, at least for me as someone who’s not totally familiar with unix systems. When I first used the copy module, I didn’t specify the mode. The scripts were executable on my machine (I ran
chmod +x scriptname.sh) but they were not executable when Ansible tried to run them. I had to use themodeto specify that it has the execute attribute (the 7 on 0744). - command module: Multiple things happened with this module.
argv: The parameters of the command. If you notice, the first parameter is actually the command that we want to run. The rest of the parameters are parameters that will be passed to the script being called.args: chdir: thesvc.shscript requires that the command is executed from the same directory of that file.chdirspecified the path on which the command will be when it’s executed.
Regarding the downloadAndInstallAgent.sh script:
- I’ve tried to simplify the original script, by using constants instead of environment variables. I’ve also changed the hardcoded URL to download the installer from
platform=linux-x64toplatform=linux-arm64
Wrapping up 🔗
Hopefully this blog post gave you a better understanding on how you can deploy and launch an agent more quickly, and also deploy agents to multiple hosts. In this case I’ve used 4 Raspberry Pi, but this is expected to work across any other host that supports agents (with some minor tweaks on some cases).
If you have any suggestions or questions, let me know by reaching out on twitter, linkedIn or create a GitHub issue on my Presentations repository.
Thank you for reading!