I’ve recently switched to a DevOps role in a new company. I know some basic DevOps concepts, CI/CD, pipelines, builds, artifacts and so on, but never really laid my hands on it.
I’ve been doing a bunch of Microsoft Learn modules related to DevOps and other key components that will be part of my new daily basis.
One that caught my attention was the Host your own build agent in Azure Pipelines, which is a module from the Build applications with Azure DevOps learning path.
While doing that module, there’s an exercise that guides you through creating a VM in Azure and deploying an agent. It’s a pretty straight forward process, especially since you only have to follow the commands they show you.
Finding that the RaspberryPi can be an Agent 🔗
After finishing the module, the summary shows you some links that can help you through your journey. One of which was the Self-hosted Linux agents. I’ve opened it just by curiosity, and here’s what I’ve found. Here’s a screenshot of the supported distributions at the time of this writing:
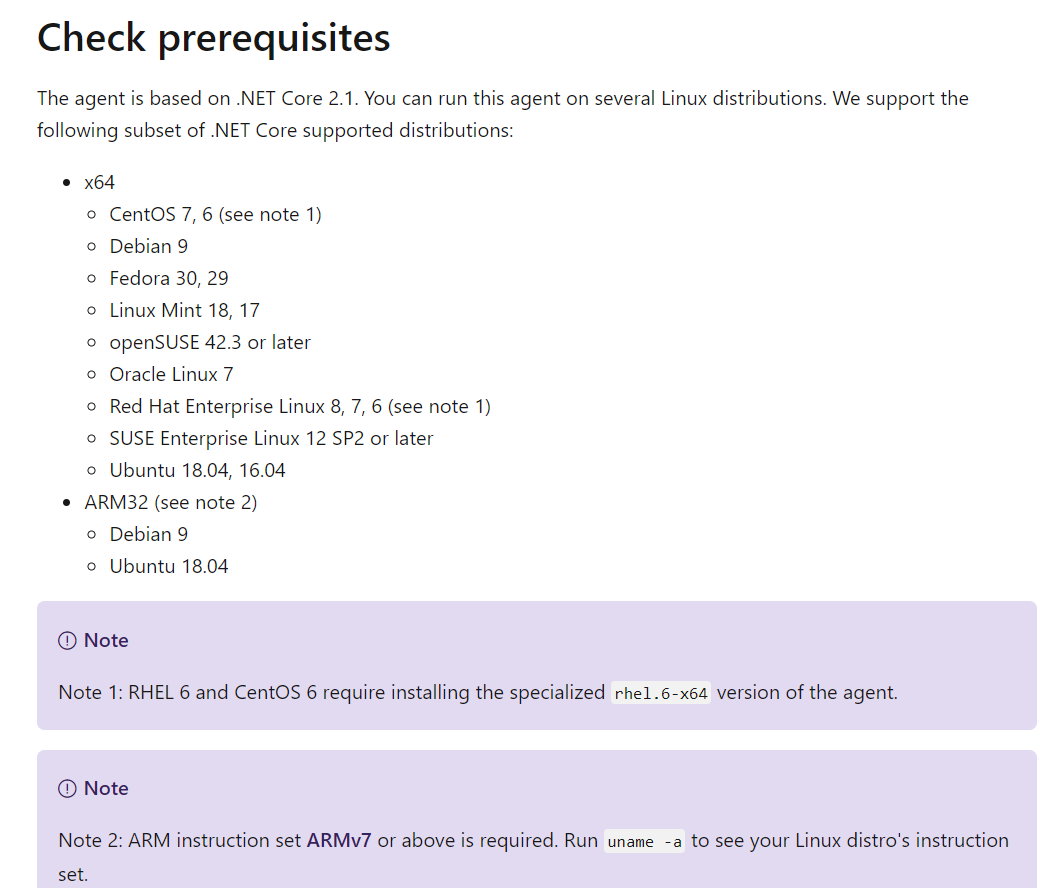
Notice the note 2:
ARM instruction set ARMv7 or above is required
It requires an ARMv7 or above, which means we can only work with the Pi 2 model B and later (excluding the pi 0 and 0w, since they have ARMv6). For this series (yes, there will be more than 1 post about this), we’ll use the pi 2b, 3b and 4b.
Why did I find the need to use my RaspberryPi as an Agent 🔗
The day right after I did this module, I woke up and had 2 emails from GitHub. Frank Lesniak (t) created two issues on PowerShell IoT:
That got me wondering, because last time I picked up on PowerShell IoT (long time I know), I’m pretty sure that I was using the Raspberry Pi 4 already. Same with the Raspberry Pi OS.
After I properly woke up (aka, drank some coffee), it occurred to me: “What if I can use a build pipeline to ensure that our module at least loads on every raspberry model we want to support?”
This is possible because the dotnet SDK is already supported on ARM32 (and ARM64), which means that the raspberry can build the code and generate an artifact.
Even better: I can even plug more Raspberry and test each model, as well as different OS (such as Ubuntu) and even 32 vs 64 bits (more on upcoming blog posts).
Starting simple 🔗
Before we get ahead of ourselves, let’s start by:
- Understand what is an agent and an agent pool.
- Understand what do we need to configure our Raspberry Pi to be an agent and configure it;
- Create a simple demo for C# and build it with Azure Pipelines, using our Raspberry as an agent;
Some key concepts/terminology before we proceed 🔗
In Azure DevOps, there are organizations and projects. An organization can have multiple projects. If you are working on your own projects, you can have something like “MyOrg” as your organization, and then all your projects under that organization.
But let’s consider the following example: If I have a company that works for other clients, I would probably have one organization for each client, and under that, all the projects for each client (organization).
These two concepts (organization and project) are important because there are settings that are under the organization (which means that they affect/can be used by every project), and settings that are under each project (meaning other projects under the same organization cannot see/use them).
Understand what is an agent and an agent pool 🔗
As a (overly) simplified explanation, think of an agent as some sort of machine capable of receiving a request to run a build and execute it. It can be your computer, a VM, a server, or as in this case, a raspberry Pi, etc.
An agent pool, as the name implies, is a pool of agents ready to receive and execute builds.
Understand what do we need to configure our Raspberry Pi to be an agent and configure it 🔗
First and foremost, we need to have an account on Azure DevOps. If you don’t have an account yet, go ahead and create one. If you have a GitHub account, you can use that. Notice that this is free of charge!
Generate a Personal Access Token (PAT) 🔗
A PAT is the way that your agent will be able to authenticate to Azure DevOps and start receiving jobs.
In order to generate the PAT, go to your Azure DevOps account settings > Personal Access Tokens
Create a new token and select the following:
- Press the “Show all scopes”
- On the Agent Pools > Read & Manage
- On the Build > Read & Execute
- As it suggests, take note of the PAT, because you’ll need it and it won’t be displayed again. Keep in mind that this should be treated like a password!
Go to the project where your Raspberry will be used as an agent and go to the project settings. In this case, I’ve created a project called “RaspberryPi_Demo”, which is the one I’ll be using for this example.
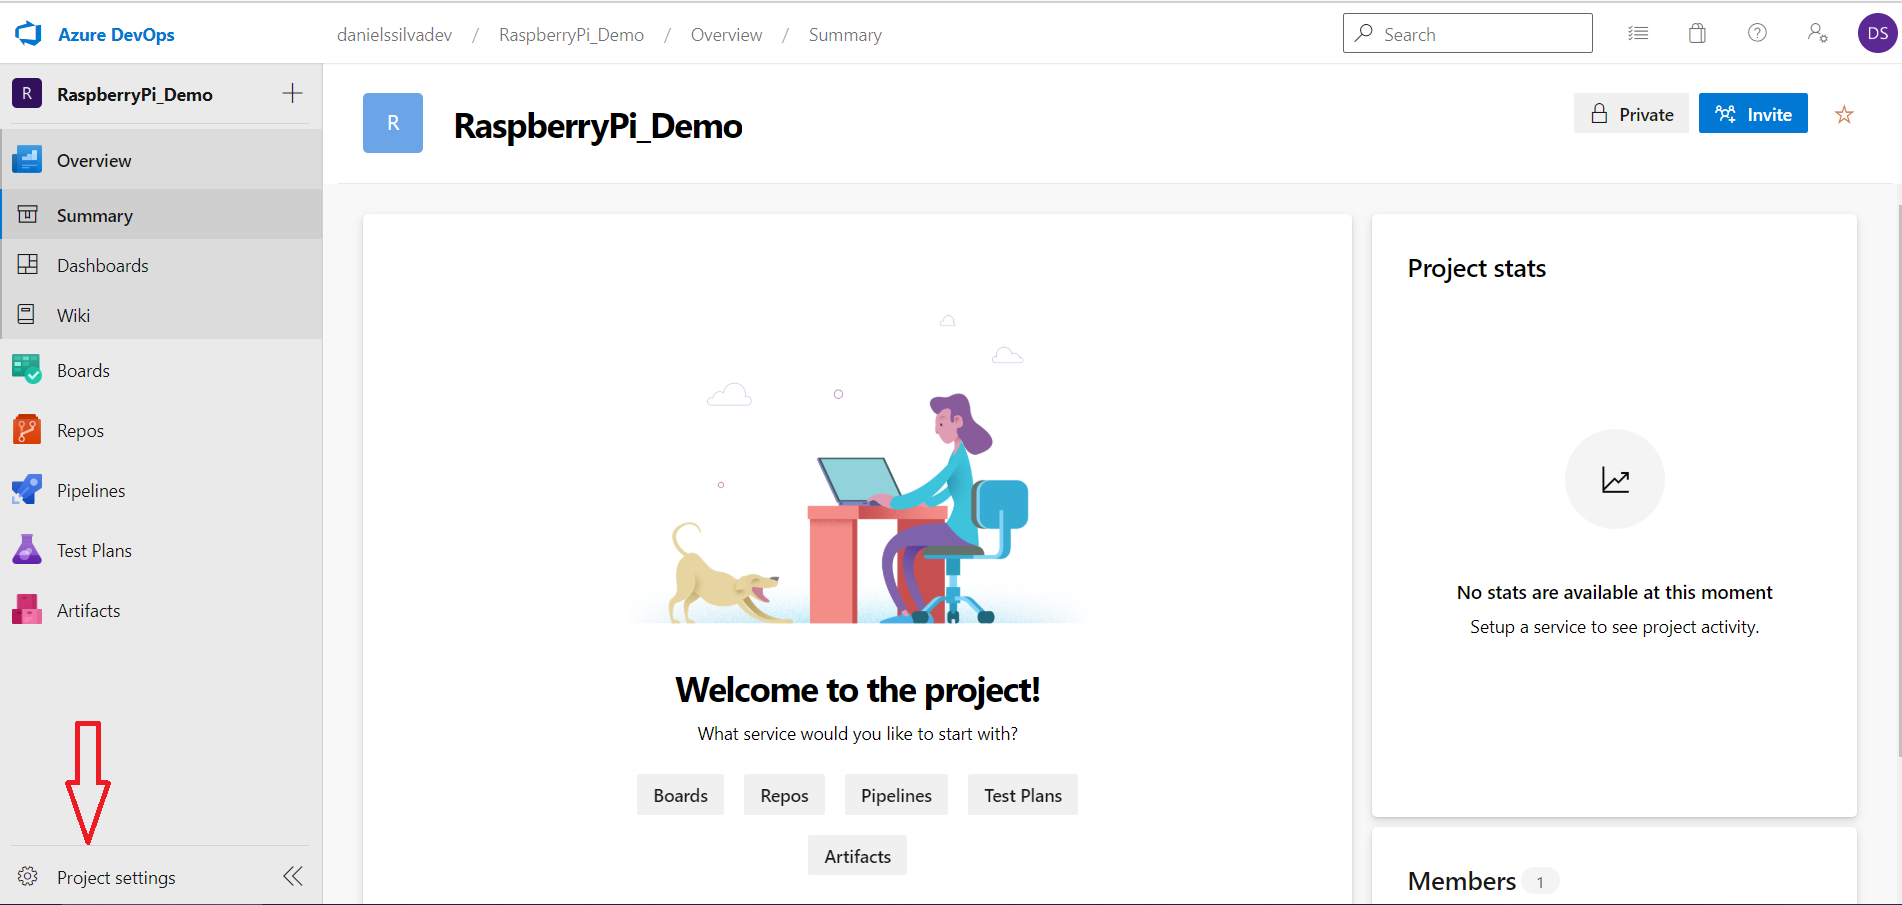
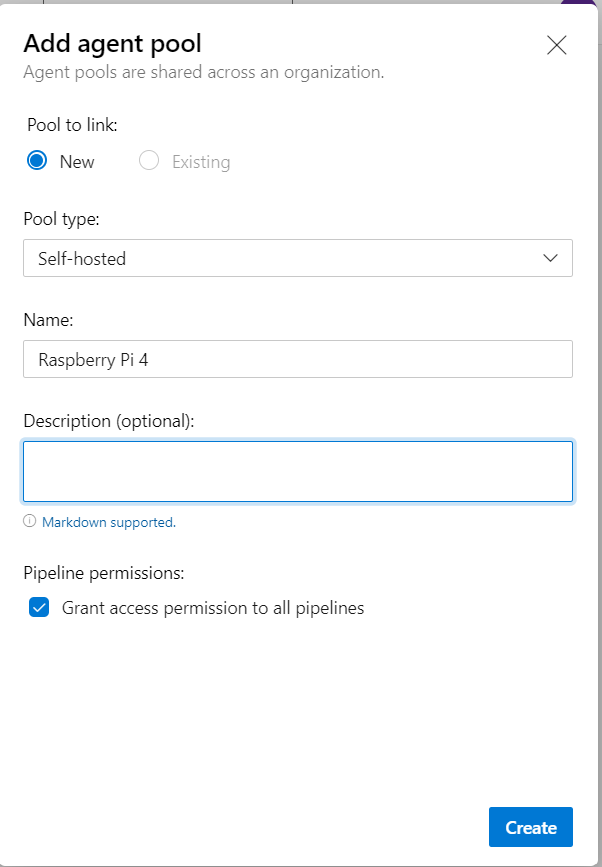
Next, go to the Pipelines section > Agent Pools > Add Pool

In this case the pool type will be self-hosted and then you just need to give it a name and can give a description
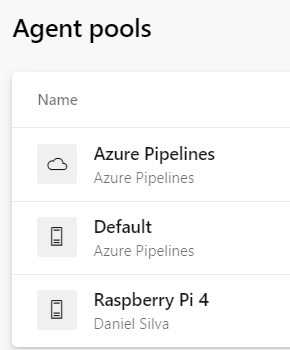
You will then see a new agent pool along with the existing ones
Now that you have your pool, it’s time to add some agents!
When you press the “New agent” button, you are prompted with something similar to the following (notice that I’ve already selected Linux and ARM64)
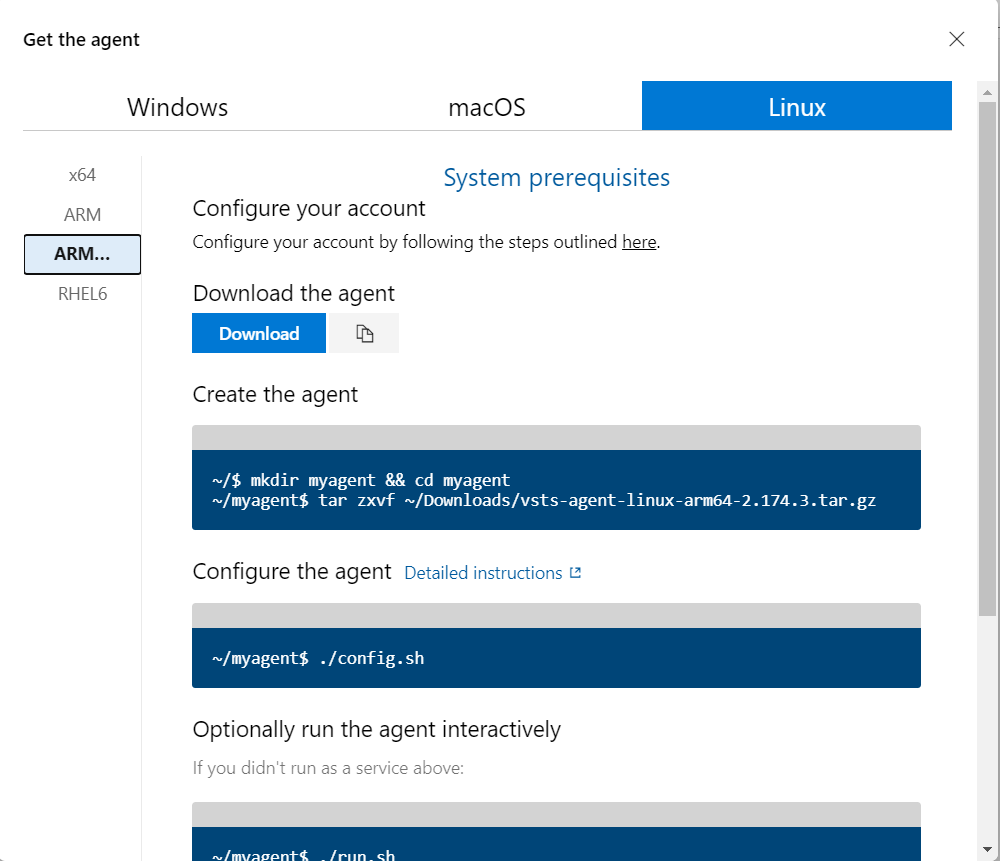
Because my Raspberry Pi 4 is using the Ubuntu 64bit version, I’ll use the ARM64 agent. But the process is the same for the 32bit version.
Although they provide some pointers to what you have to do, we’ll do it differently.
NOTE: In this example, we’ve configured the Agent Pool at the project level, but it could also be configured at the organization level, allowing other projects to use the same agents.
Installing the required software 🔗
Before installing the agent and configuring it, we’ll install the tools that we require to build our code. In this example, because we are using C#, we’ll need dotnet.
On their module exercise, Microsoft has an helper script to install the dependencies required for the project used.
I’ve adapted that script to only download dotnet 3.1, since it is the only tool we need (for now).
As with everything on the Internet, you should first check what the script does and only run if you trust it.
On your pi, run the following:
wget https://gist.githubusercontent.com/DanielSSilva/d7aa088605ac6c0a639da577f6b02c20/raw/e5c1098d43999046d094bd34e6cadadb3bf078e9/setup_dotnet.sh
Inspect the content by doing
cat setup_dotnet.sh
Make the script executable and then run it:
chmod u+x ./setup_dotnet.sh
sudo ./setup_dotnet.sh
After it’s done, you’ll have to add the /.dotnet folder to your PATH. One way to do so is by editing the ~/.bashrc file and adding the following to the end of the file:
export PATH=$PATH:$HOME/.dotnet
export DOTNET_ROOT=$HOME/.dotnet
Now that we have the required software, we can proceed with installing and configuring the agent.
Configuring the Raspberry Pi to be an agent 🔗
Following the instructions that we saw on the “New agent”:
- Download the correct agent
- Create a folder that will hold all the extracted files from the previously downloaded file
- Go to that folder and run the
config.sh
- The “Server URL” is https://dev.azure.com/yourOrganizationName.
- Remember the PAT that you were asked to save? You will need it now.
- The agent pool is the name of the pool you’ve created.
By the end of the configuration, you should have something like this:
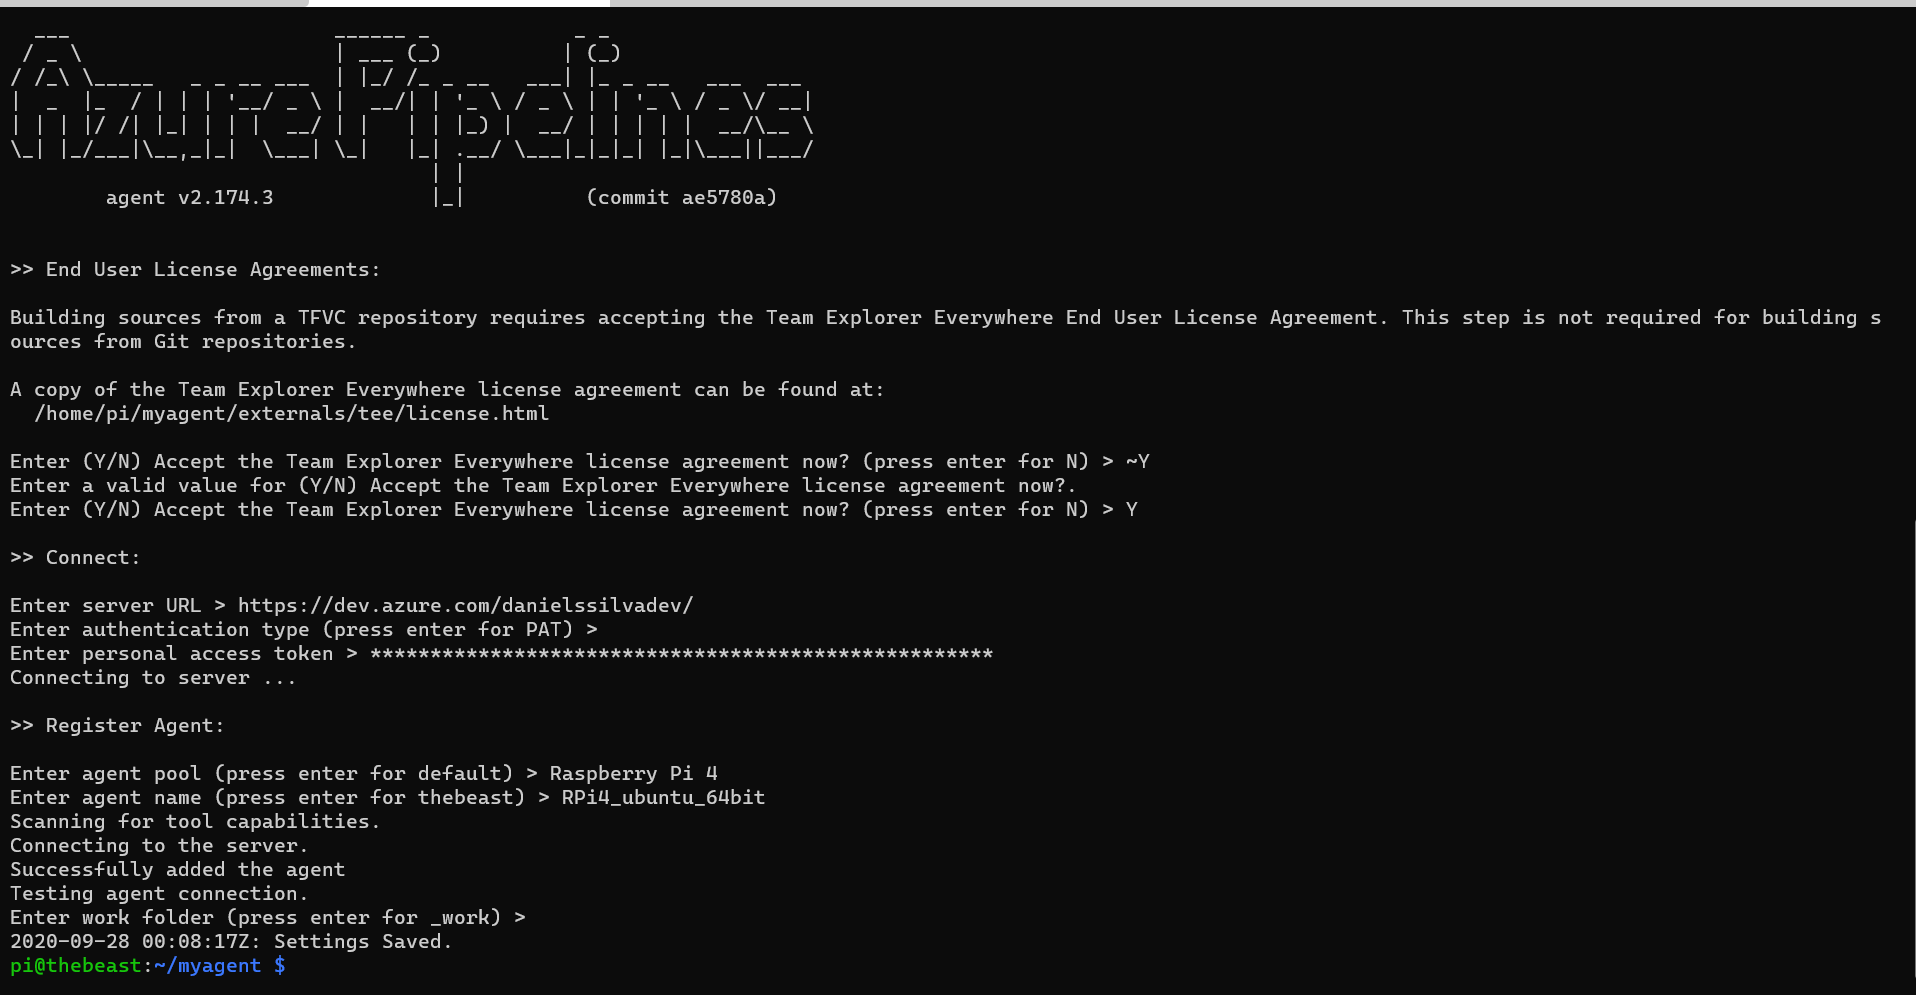
If you go back to your project settings > Pipelines > Agent Pools > select the pool you’ve created > Agents, you should see your raspberryPi there, although it’s Offline. This is because all we have done so far was registering the pi as an agent. It’s not running.
You now have two ways of running it:
- by launching
run.sh- The script will be running in foreground listening for jobs - by running as a service, through
svc.sh.
For this example, we will go with the first approach and I’ll leave the “running as a service” for Part 2.
By running run.sh, we can see that the pi is now online on Azure DevOps website

All it’s left to do in order to see if everything is working is having some code to be compiled and published
Create a simple demo for C# to be built by our agent 🔗
I’ve created a simple GitHub repository with the most simple c# code, a console app that outputs the famous “Hello World”.
You are more than welcome to fork it, or simply create a repo for your needs.
The repository has a YAML file that specifies the build conditions for the pipeline. I won’t go into much details but here’s what it’s specifying:
- It will trigger the pipeline build on each commit;
- It will use the pool Raspberry Pi 4. In this case we only have 1 agent. On the next posts of this series we will see why this is relevant.
- Restore the project dependencies;
- Build the project;
- Publish the project;
- Create the artifact;
What’s most relevant in this YAML file is the pool part, since it’s where we are specifying that we are using our pool.
Create the pipeline 🔗
Go to your project and on the left side go to the Pipelines and create a pipeline. We will use GitHub (YAML) and select the repository, in this case the CI-CD-Rpi repository.
We are presented with the same YAML that we have on the repository, where the pool is already defined as Raspberry Pi 4.
Triggering the pipeline 🔗
After changing the YAML content, you can simply press “RUN” if you want the pipeline to run immediately.
That’s exactly what we want for this case.
If you left the pi running the run.sh script, you should now see that it’s running a job.
Confirming that’s running on our raspberry 🔗
Go ahead and open the pipeline job to check how it’s going. If you select the “Initialize job”, you can see that it’s using the agent.

Checking the deployed artifact 🔗
Because on our YAML we specified that we wanted to drop an artifact, we can in fact access that artifact on our raspberry, since it’s our agent.
Check the “Publish Artifact:drop” step to see where it’s uploading the artifact.
In my case it’s on '/home/pi/myagent/_work/3/a'.
Let’s check that folder, unzip it and see if we can run it.

Wrap up 🔗
Although this post became way longer than I anticipated, the process is pretty straight forward and allows you to have your Raspberry Pi as an agent.
What’s next? 🔗
There are still several things that can be improved. The next challenge will be setting up multiple Raspberry Pi as agents, each with different OS and/or CPU architecture (32bit vs 64bit) and generate builds and artifacts according to different needs.
Thanks for reading and stay tuned!