While I was writing for my second part of “Using RaspberryPi as an Azure agent for Pipelines” (you can see the part 1 here) I came across a tedious scenario: I needed to connect to different machines, download some software and perform some configurations, all using the terminal. I’m currently using a cluster of 4 raspberry pi as servers/agents/nodes/you name it, and after deploying the software on the first one I thought “there must be a better and faster way to achieve this”, and it is where Ansible comes into play.
Before we start 🔗
This blog post is just the very tip of the iceberg. It serves just as an introduction to Ansible, and more specifically for my second part of “Using RaspberryPi as an Azure agent for Pipelines” series. If you want to get to know more about Ansible, I strongly suggest Jeff Geerling’s (b|t) book “Ansible for DevOps” as well as his youtube series.
What’s Ansible and why am I using it? 🔗
Ansible is a language that allows you to manage multiple machines/containers/servers/etc by defining what you want to achieve by creating ad-hoc commands or playbooks. Essentially it allows you to “Turn tough tasks into repeatable playbooks. Roll out enterprise-wide protocols with the push of a button.”.
In this case, because I want to execute the same steps across different machines, this seems to be a good way to achieve this, since I define the code once and I can target as many machines as I want.
Installing Ansible 🔗
There are many different ways to install Ansible across different operating systems. For me, the best way to install it is through pip (the package installer for python), since it works on every operating system.
Note: If you are on Windows and don’t want to deal with all the headaches of getting python to work on Windows (through Anaconda or other softwares), I strongly suggest you give WSL a try.
It’s suggested that you used python3.
In case you don’t have pip installed, you can easily install it by running the following: sudo apt install python3-pip.
Then you can run sudo pip3 install ansible, and once it finishes you are ready to rock!
SSH Setup 🔗
Ansible requires you to have a passwordless ssh authentication. In case you are not familiar with it, essentially you store your public key on the server you are trying to connect to, and use your private key to authenticate yourself (don’t quote me on this, I’m not totally familiar with SSH, but that’s my understanding). You can find multiple tutorials on how to achieve this, but here’s a quick way to do so (huge thanks to Andrew Pruski (b|t) for the tips for ssh):
- create a new ssh key pair using
ssh-keygen - enter a file name, something like
/home/daniel/keys/myKeys(no need for a passphrase in this case) - do
ssh-copy-id -i /home/daniel/keys/myKeys.pub user@hostname. - Edit/create a
~/.ssh/config
Host control1 #the name of your machine
    HostName 192.168.1.135 #its IP
    User daniel # the username on the target machine
    IdentityFile /home/daniel/keys/myKeys # the path to the previously created key
Host node1
    HostName 192.168.1.137
    User daniel
    IdentityFile /home/daniel/keys/myKeys # the path to the previously created key
Host k8s-node-2
    HostName 192.168.1.139
    User daniel
    IdentityFile /home/daniel/keys/myKeys # the path to the previously created key
Host k8s-node-3
    HostName 192.168.1.141
    User daniel
    IdentityFile /home/daniel/keys/myKeys # the path to the previously created key
- you can now simply do ssh control1 and you are in!
Hosts 🔗
Because Ansible can target multiple hosts, it needs to know who it is going to connect to.
Ansible has a concept of “inventory”, which is essentially a list of hosts.
By default, that list is located on /etc/ansible/hosts, but you can override it by having a hosts.ini file and make Ansible target that.
Basic structure of a hosts file 🔗
In this case we are using the .ini extension (you can also use YAML or other inventory plugins).
The basic structure is as follows:
[myServers]
control1
node1
node2
node3
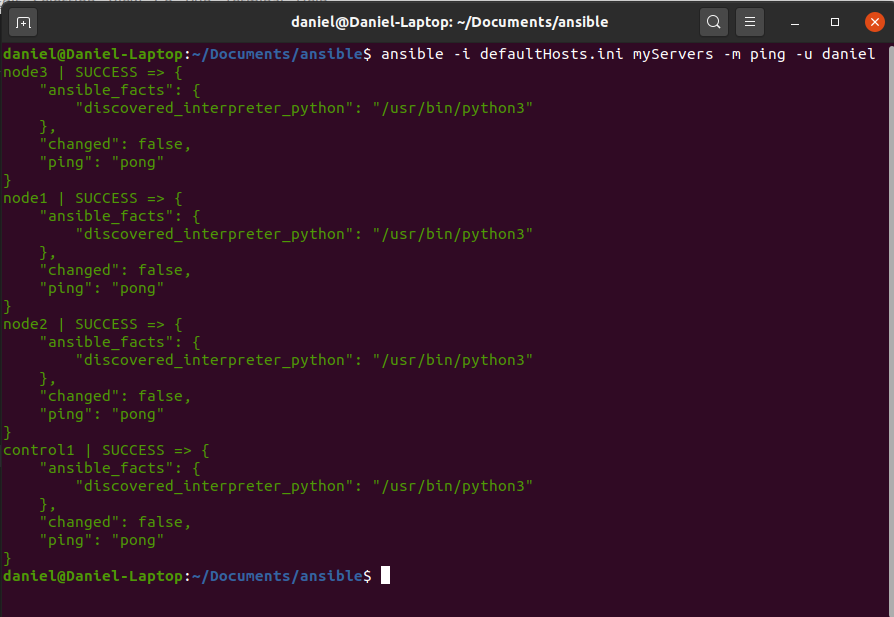
Upon creating this file (defaultHosts.ini in this case), we can run a simple ping, using the “ping” module.
I won’t go into details into the modules section.
Here’s it in action by running ansible -i defaultHosts.ini defaults -m ping -u daniel

In this case, we simply sent a ping to all our servers on defaultHosts.ini and they all answered with a “pong”.
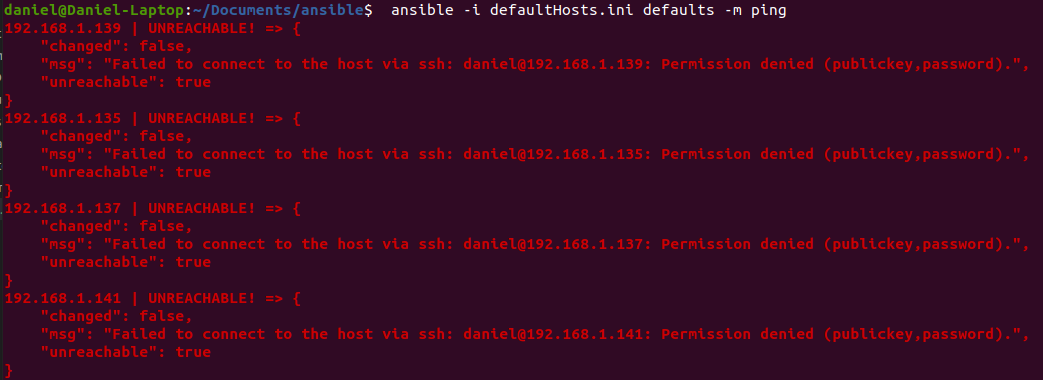
NOTE: In case you misconfigure the ssh passwordless authentication, you will get an error such as this one:

Group hosts by name 🔗
Another useful way to declare our hosts is by grouping them. In this example I have a raspberry which is the one that controls the cluster and 3 others that are nodes on that cluster.
For that reason, it might be useful to separate them into 2 groups: control and nodes.
It can be achieved with the following hosts.ini:
[control]
control1

[nodes]
node1
node2
node3
Furthermore, I can have a third group which is the combination of the previous 2:
[control]
control1

[nodes]
node1
node2
node3

[all:children]
control
nodes
This way I can do the following:
- Target my controls servers:
ansible -i hosts.ini control -m ping -u daniel - Target my nodes servers:
ansible -i hosts.ini nodes -m ping -u daniel - Target both controls and nodes:
ansible -i hosts.ini all -m ping -u daniel
Playbooks 🔗
This is where the fun starts. Playbooks can be seen as a list of tasks of what Ansible has to do on the host(s). I really like this definition that’s present on Ansible’s documentation:
If Ansible modules are the tools in your workshop, playbooks are your instruction manuals, and your inventory of hosts are your raw material.
Ansible has a lot of builtin modules. For this example we will use two: ping and copy. Let’s create a playbook that pings the control server and copies a file, and then let’s do the same for the node servers.
Here’s how it looks:
---
- name: ping and copy file to control
  hosts: control

  tasks:
  - name: ping control
    ping:

  - name: Copy a file to control
    copy:
      src: /home/daniel/Documents/ansible/controlFile.txt
      dest: /home/daniel/controlFile.txt

- name: ping and copy file to nodes
  hosts: nodes

  tasks:
  - name: ping node
    ping:

  - name: Copy a file to node
    copy:
      src: /home/daniel/Documents/ansible/nodeFile.txt
      dest: /home/daniel/nodeFile.txt
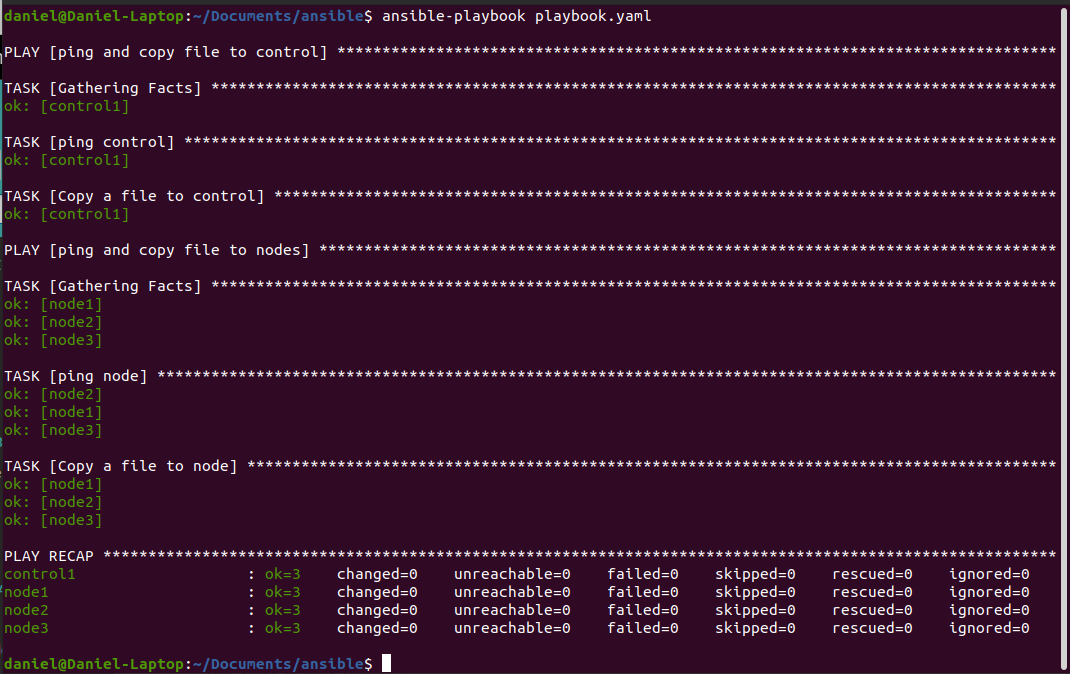
Playbooks can be executed by running ansible-playbook playbookname.yaml.
ALthough, if you go ahead and run this, you will get an error:

This happens because ansible has a configuration file called ansible.cfg, which has some default configurations.
One of such configurations is the location of the inventory (the file where we defined our hosts).
Check the documentation to know more about this.
If we don’t want to change this setting globally, we can create an ansible.cfg file on the same level as the playbook.
Create a new ansible.cfg with the following content, where hosts.ini is the name of the inventory file that you previously created:
[defaults]
inventory = hosts.ini
If we try to run the playbook again:

Ok so it’s all green, seems good! Let’s make sure that all files have been copied, the “old school” manual way:

Wrapping up 🔗
As I’ve mentioned, this is just an introduction reference for my second part of “Using RaspberryPi as an Azure agent for Pipelines” series, where I will be using a more useful playbook.
If you want more blog posts about Ansible, let me know by reaching out on twitter, linkedIn or create a GitHub issue on my Presentations repository.
Thanks for reading!